It’s probably your busiest month of the year. But there are things you can do to make your return from the holidays less stressful.
December always goes by so quickly. Seems like you’ve just finished Thanksgiving dinner and it’s time to ring in the New Year. You could probably spend the entire month on your personal obligations. But it’s also the end of the year, which means your busiest period if you’re a retailer. Even if you’re not, you probably have sales goals to try to meet. And you may have employee issues that need to be addressed before the calendar turns over.
On top of all of this, you should be closing out your books for the current year (as much as you can) in preparation for the new one. If you’ve been using QuickBooks Online conscientiously all year, your job will be a lot easier. But you’ll still need to carve out some time for year-end tasks.
We don’t expect that you’ll necessarily be able to wrap absolutely everything up by New Year’s Eve. You may be waiting for your customers and employees to do their part. But here are five things you can do amidst all of your other personal and professional plans that will help you get a jump on January.
Analyze your 2022 sales.
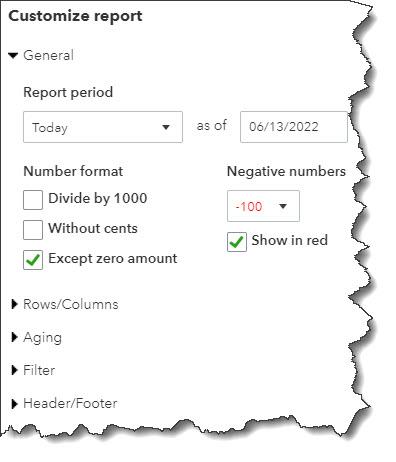
You won’t have your final numbers until the year is over, but you can get a good start in December. There are several QuickBooks Online reports that can give you a clear, understandable look at your 2022 sales. Click Reports in the toolbar and scroll down to Sales and customers. You can run reports that will tell you what your sales were by Class, Customer, Customer Type, and Product/Service, in summary or detail. The reports are customizable, so you can specify date ranges and group the results by, for example, Transaction Type, Customer, and Account.

Warning: If you’re not clear about whether you should run reports in Cash or Accrual mode, let us help you with this. The distinction is important.
Know What You Owe
If money is tight at the end of the year, this will be a challenge. But you don’t want to come back from the holidays to a lot of past-due notices. To see what still needs to be paid, click Reports again and scroll down to What you owe. If you want the straight scoop right away, run Unpaid Bills. For a more detailed look, create the Accounts payable aging detail report. This groups your outstanding payables by days past due.
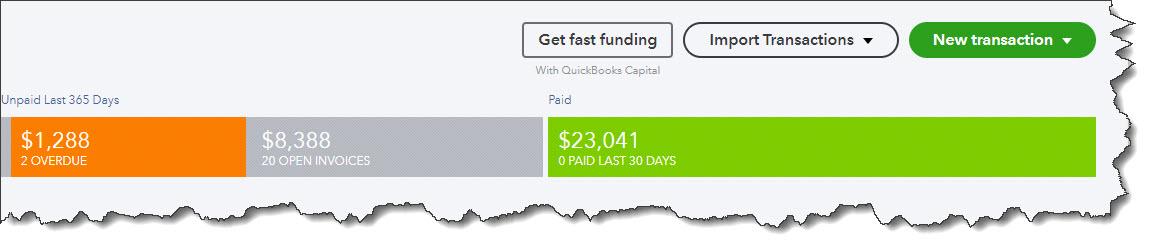
Know Who Still Owes You Money
This is a question that’s probably on your mind all year, but it’s especially important as the year winds down. It may be difficult to get delinquent customers to pay up in December, but you should at least know where you stand with them. Click the Reports tab again and scroll down Who owes you. Generate two reports there: Accounts receivable aging detail and Open Invoices.
You might also want to spend an hour coming up with some strategies that would encourage customers to pay faster. If you’re at a loss about this, we could sit down together and come up with a plan.
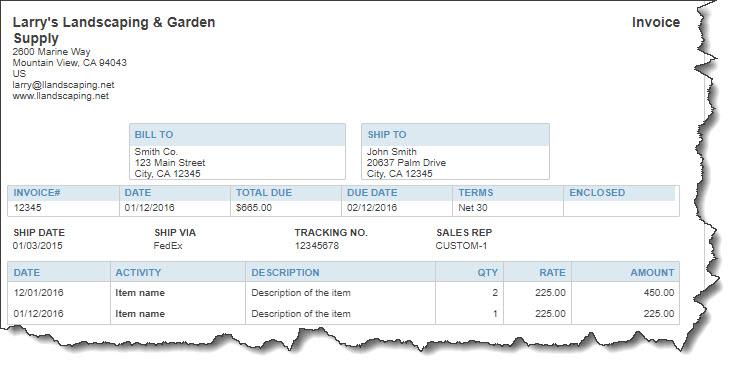
Create statements for past-due customers
Customer statements are something like reports. They display sales transactions within a given period. Statements can serve two purposes. Sometimes, customers just want a list of their invoices and payments for their records. You can also use statements as a reminder to customers who are past due on their accounts. Click New in the upper left corner, and then click Statement under Other. There are three types, but you’d be most likely to create and send two of them:
- Open Item. Displays all open, unpaid invoices for the last 365 days.
- Transaction Statement. Lists all transactions for the selected date range.

You can send statements to customers to remind them of overdue payments or just to provide a record of transactions for a given period.
Clean up your customers and vendor lists
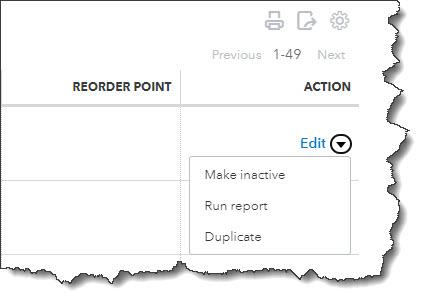
If you only have a few of each, your list is probably current. But if you’ve been adding customers or vendors for years without ever editing the list, you’re probably spending too much time scrolling. You don’t have to delete them. You can just make them inactive. Click Sales in the toolbar, then Customers. If you know a customer has no open activity and you want to hide them, click in the box in front of the company or customer’s name. Repeat this for as many as you want, then click Batch actions in the upper left, then Make inactive.
A Busy Month
Don’t worry if you don’t get to all of these by the end of the year. But do add them to your January task list if you don’t. You might also consider having us run the standard financial reports that are available in QuickBooks Online Reports, under For my accountant. You can create reports like Trial Balance yourself, but they can be hard to analyze accurately. We’d be happy to set up a time after the first of the year to go over these after all of your 2022 transactions are in.