If you haven’t checked out QuickBooks Online’s free mobile app, you might be surprised at how much it can do.
There was a time when leaving the office meant you were done with work for the day. These days, many homes are offices. And easy mobile access has made it difficult to get away from work.
That can be a good thing, especially if you’re a small business owner who must keep a close eye on what goes on outside of regular hours. Many productivity websites have mobile companion apps that make it possible to pick up where you left off when you were sitting at your laptop or desktop.
QuickBooks Online is one of them. Its mobile apps (iOS and Android, which look and work similarly) can’t replicate absolutely everything on the website. For example, you can’t work with projects or pay contractors or define sales taxes or run most reports. But they do a good job of providing the tools you’d most likely need when you’re away from your regular workspace. Let’s take a look at them.
A Terrific User Experience
Intuit did a great job designing its mobile apps to be easy to use on small screens. It takes very little time to learn how to navigate around, and individual working screens are clean, attractive, and understandable.
When Should You Use Apps?
There are only two things that QuickBooks Online’s apps can do that the desktop version can’t: track mileage and snap photos of receipts. There are other situations when it’s very convenient to have the apps available, like creating a sales receipt or invoice for a customer in person, adding basic details for a new customer or vendor, or checking your account balances. It’s probably best to do the bulk of your work on your desktop or laptop when you can, to avoid errors caused by small—and abbreviated—screens.
Navigation Icons
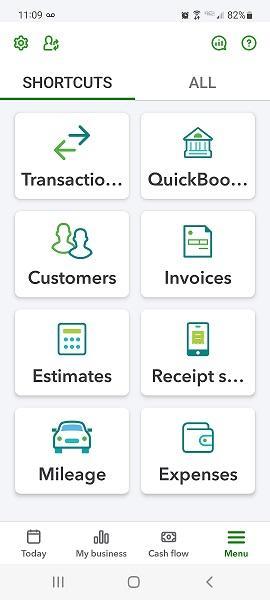
The apps open to a screen called Today, which is their version of a desktop application’s Dashboard. There are links to actions like creating an invoice and looking up a customer, as well as a to-do list, the QB Assistant (a support tool), your account balances, a link to recent transactions, and real-time information about the status of your invoices and bills.
The other three icons at the bottom of the screen serve as navigation tools. The one on the far right labeled Menu opens two screens that can be toggled back and forth. One is Shortcuts, pictured below, a series of links to common actions. The other, All, opens a more traditional, comprehensive menu of links to individual app functions, like a Profit and loss report, Sales receipts, and Products & services.
The QuickBooks Online app’s Shortcuts screen
Besides those functions, there are links to other financial activities on the All screen. The ones you’d be most likely to use remotely are:
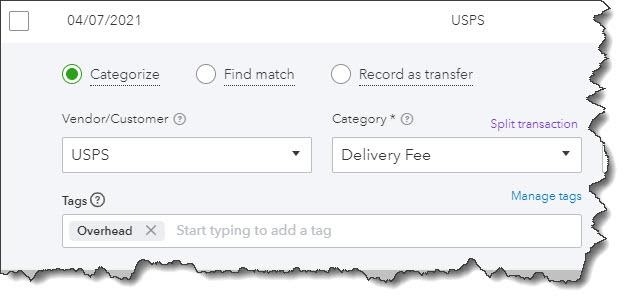
- Transactions. The ones you’ve imported from your banks are available via this shortcut, as well as any you’ve entered manually on your desktop or phone. You can also get to the list by clicking on an account name on the Today screen.
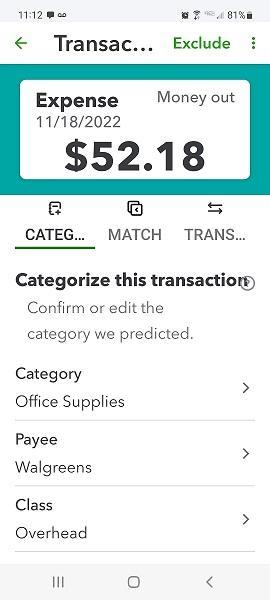
- Receipt snap. Using your phone’s camera, you can take a picture of a receipt. The app will pull some of its data and deposit it on an expense form that’s accessible on the app and the desktop version, where you can fill in the blanks and see the picture.
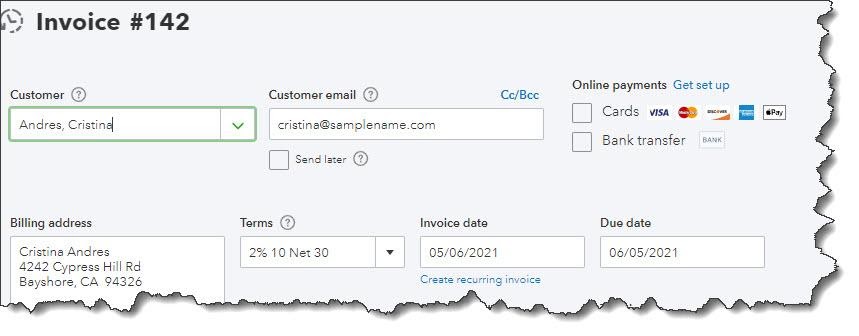
- Invoices and Estimates. View, modify, and add them.
- Customers and Vendors. Abbreviated versions of your records.
- Expenses and Bill Pay.
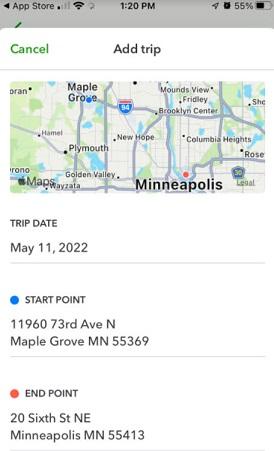
- Mileage. Enter trip data manually or automatically, through your phone’s location services.
Data entry on the mobile apps is as easy as it is on the browser-based version of QuickBooks Online.
About Your Business
Another bottom-of-screen icon takes you to My business, which provides an update (charts and numbers) of your income, expenses, and profitability. And another is Cash flow. Cash flow is actually a pretty complex accounting concept that you can’t fully absorb on a mobile phone screen, but it’s very important that you have a good understanding of how your company is doing. You can ask us about this.
Give It A Try
January is always a good time to develop new habits. We’ll be talking about some of these next month, but in the meantime, you might download and explore QuickBooks Online’s mobile app. You probably won’t need our help learning to use it, but we’re always happy to step in and assist when you’re having trouble with desktop QuickBooks Online.
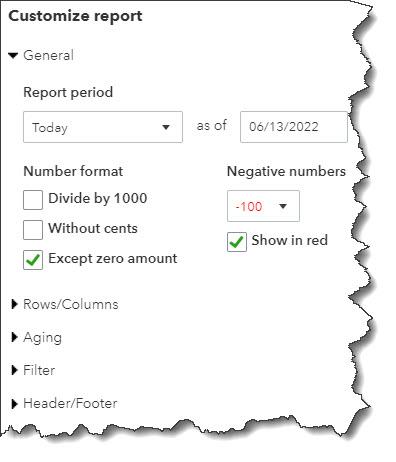
 You can customize and run QuickBooks Online’s Sales reports.