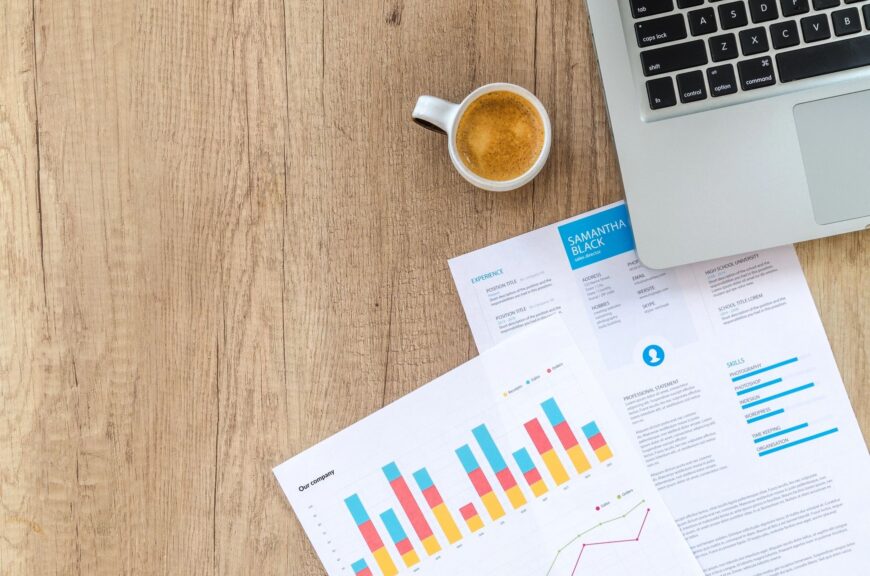
How to Create Estimates in QuickBooks Online

Whether you sell products or services, you may need to create estimates in QuickBooks Online. Here’s how it’s done.

It would be nice if you could just instantly invoice every sale. But sometimes your customers need to know what a particular purchase will cost before they make the decision to buy. So you need to know how to create an estimate. If the sale goes through, you’ll of course want to send an invoice.

QuickBooks Online automates this entire process. It even helps you track the progress of your estimates by providing a special report. Here’s how it works.

Just Like An Invoice – Almost

The process of creating an estimate in QuickBooks Online is almost identical to creating an invoice. You click the New button in the upper left and select Estimate

Creating an estimate in QuickBooks Online is like creating an invoice, with a few differences.

When the form opens, you’ll notice one difference right away. Directly below the Customer field, you’ll see the word Pending next to a small down arrow. Click it to see what your options are here. You’ll be able to update its status later. Select a Customer to get started. If this is a new customer, click + Add New and enter at least the name. If you want to build a more complete profile at this point, click Details and complete the fields in the window that opens. To send a carbon copy or blind copy of the estimate to someone else, click the Cc/Bcc link.

Next to the Estimate date, there’s a field for Expiration date. Enter that and continue on to add the products and/or services that will be included, just as you would on an invoice. If you’re generating an estimate for a new product or service, click + Add new in the drop-down list. A panel will slide out from the right that allows you to create one. 

You’ll see more options for your estimate at the bottom of the page. You can add a message in the message box (or leave the default message if there is one). You can also Customize it, Make recurring, or Print or Preview it. When you’re satisfied, Save it, and send it to the customer. 

Table

Description automatically generated

You can preview your estimate to see what the customer will see before saving it.

Updating the Status

Your estimate will not be considered a transaction until you accept it. To do this, click the Sales link in the toolbar, then All Sales. Find your estimate in the list by looking in the Type column. Click the down arow next to Create invoice to see your other options there. You’ll see that you can Print or Send it or save a Copy

Click Update status. In the window that opens, click the down arow next to Pending. From the list that drops down, select Accepted. You can also mark it Closed or Rejected. If you choose any of the last three options, another window opens that allows you to enter the name of the individual who authorized the action and the date it was done.

Click Create invoice if your estimate was accepted. You’ll have three options here. You can invoice your customer for:

  • The estimate total.
  • A percentage of each line item.
  • A custom amount for each line.
Graphical user interface, text, application

Description automatically generated

When you locate your estimate on the Sales Transactions page, you’ll have several options for managing it.

After you’ve made your selection, click Create invoice to open the form with the amounts filled in based on your preference. Complete anything that’s unfinished but do not change any of the product or service line items. Save it, and your invoice is ready to go. You can always check the status of your estimates by running the Estimates by Customer report.

Creating and tracking estimates is as easy as working with invoices. You may run into difficulties, though, if you need to do anything beyond that point with estimates, such as modifying it and re-submitting them. We’re here to answer any questions you might have about this. It’s important that you get your estimates and their subsequent invoices exactly right, so you don’t lose money or sales. Let us know if you want to go over these concepts.

Some Small Businesses Are Recovering. Is Yours?

The COVID-19 pandemic isn’t over, but many small businesses are on the upswing. How QuickBooks Online can help if yours isn’t.

Intuit recently did a survey documenting the financial losses that many small businesses had experienced since March 2020. Not surprisingly, the report, Intuit QuickBooks Small Business Recovery, found that COVID-19 has had a significant impact on the financial health of U.S. small businesses.

But many of the companies surveyed have proved to be resilient. As of March 31, 2021, 61 percent of them saw an annual revenue increase compared to pre-COVID days.

How would you have answered the survey? If indeed you did suffer financial and personnel losses because of the pandemic, has your business started to rebound yet? If not, there are actions you can take in QuickBooks Online to help in your recovery. Here are some of them.

Transactions: Watch your income and expenses like a hawk.

QuickBooks Online provides excellent transaction-tracking tools that help you document income and expenses.

How much time do you spend working with your downloaded transactions? If you take advantage of the excellent tools QuickBooks Online provides, you may notice patterns that you’ll want to explore and modify. For example, are you spending too much in one or more particular areas? When and where is your income dipping?

It’s critical that you connect to as many online financial institutions as possible, so you get a complete picture of your income and expenses. Once you have, click on Transactions in the toolbar, which should open to the Banking page. If you’re only going there to make sure there are no unrecognized entries, you’re missing out on some of QuickBooks Online’s transaction-tracking tools. In the image above, we’ve specified a vendor and chosen a Category and Tags. This will make your reports more meaningful and actionable.

If you don’t know what it means to Find Match, we can show you how that works. It’s a real time saver. 

Sales: Make it easier for customers to pay you.

We’ve written about accepting online payments in this column before. It’s especially important if you’re struggling. You may actually be losing sales if you don’t let potential customers pay online through a credit card or bank account transfer. And existing customers may pay faster if they can do business with you in that way.

QuickBooks Payments makes this possible. There are some nominal fees involved, but the potential increase in your income should more than cover them. Let us know if you want us to help you set up a merchant account.

When you set up a merchant account through QuickBooks Payments, you may find that your customer base will grow, and existing customers will pay faster.

Expenses: Categorize expenses with tax time in mind.

You’ve probably already filed your 2020 income taxes, but we’re well into 2021, and it’s not too early to start thinking about your current tax situation. QuickBooks Online helps you track your income carefully, but it’s equally important to make sure you know what your tax-related expenses are. You want to get every deduction and credit you can. So when you’re looking at transactions, like we described above, make very certain that you’re assigning the correct categories to each of them. 

We can help you run reports on a quarterly basis that should be of help when you make estimated tax payments. That way, you may be able to reduce your quarterly obligation during the 2021 tax year and won’t have to wait until you file in 2022 to see savings.

Time: Make sure your billable hours are billed.

Unless you have an organized, easy-to-use method for tracking billable time, some hours are likely to fall between the cracks. QuickBooks Online provides effective tools in this area. As you go through your downloaded transactions, you may see expenses that can be billed to a customer. Select the Customer/project and check the Billable box so you’ll be able to include it on their next invoice.

You can mark expenses as billable to customers in your Transactions register.

As you create time entries for you and/or your employees, you can also mark those hours as billable.

Reports: Run basic, critical reports regularly.

You can’t know how your business is doing financially unless you create reports. Besides the quarterly and standard financial reports we can run and analyze for you, you can—and should—be generating reports yourself through QuickBooks Online. Here are some of the ones we suggest:

  • Budget vs. Actuals. If you’ve put the time and effort into creating a budget, it’s critical that you gauge your progress regularly and make adjustments as needed.
  • Open Invoices. Who have you billed that hasn’t paid?
  • Accounts Receivable Aging Detail. Who owes you, and how far behind are they?
  • Sales by Product/Service Detail. What is selling well and what isn’t? You can make decisions about your product and service lines by viewing this report. This is especially important when your sales are sluggish.
  • Business Snapshot. This is a series of charts and lists that provides a quick visual overview of key data.

QuickBooks Online can’t, of course, revive your business if the pandemic has created conditions that are out of your control. But that shouldn’t stop you from controlling what you can, no matter what your situation is. It was designed not only to automate and streamline your daily accounting work, but also to provide the information you need as you evaluate your present situation and plan for the future. Please call on us if you need help making optimal use of QuickBooks Online.

How Do You Manage Downloaded Transactions in QuickBooks© Online?

Downloading them is the easy part. QuickBooks Online lets you work with downloaded transactions in numerous ways.

QuickBooks Online was built to import transactions from your online financial institutions. You can enter them manually but downloading them saves an enormous amount of time and minimizes errors. It also makes reconciliation much easier, since you can see which transactions have cleared without calling the bank or waiting for a printed statement.

Once they’re in QuickBooks Online, your transactions are stored in a list, waiting for you to further define and categorize each one. Let’s look at how you can work with them to make sure your records are as thorough as possible.

Getting Connected

As long as you have online access to your bank and credit card accounts, you can set up QuickBooks Online to import cleared transactions. Click the Transactions tab in the toolbar, then click Banking. On the next screen, click Connect account. You’ll see links to popular financial institutions on the next page. If yours isn’t listed, enter its name in the search box at the top of the screen. Follow the onscreen instructions to make your initial connection and start downloading transactions. 

When you’ve completed the connection, you can click Link account in the upper right to add more.

Dealing With Transactions

After you set up a connection to a bank or credit card account, its account information will appear in a box on the Banking page.

Once you’ve finished adding accounts, you’ll still be on the Banking page. Each of your connected accounts will appear in a box that includes the balance and the number of transactions that need to be reviewed. There will probably be quite a few, dozens or hundreds, the first time you download, since most financial institutions send you 90 days’ worth the first time. Every time your accounts are updated after that, you’ll only get new ones that have cleared since your last connection.

Tip: QuickBooks Online generally updates once every day. If you want to see your new cleared transactions at any time, click Update in the upper right corner.

Click on any of the account boxes, and its list of downloaded transactions will appear below. Make sure that For review is highlighted. You’ll notice that each row has one of two icons at the far right. Review means that QuickBooks Online has not assigned a category to the transaction. Confirm means it has, and it wants you to either approve it or change it. Check these carefully. Sometimes QuickBooks Online gets it right, but not always.

Click on a transaction in the register to open its action box. Here’s a partial view:

QuickBooks Online allows you to add a great deal of information about each individual transaction in the register.

Categorize is checked by default, since this is the most common action you’ll take in the list. Click Find match if, for example, you received a payment on an outstanding invoice, or Record as transfer. We can help you work with the latter two options.

Select a Vendor/Customer and a Category (if QuickBooks Online hasn’t assigned one or it’s not the best one for that transaction). Click in the Billable box if you want to bill this transaction to a Customer/project. You can also Split transaction if you need to divide it between multiple categories and/or billing statuses. 

There are several other options below the section pictured above that allow you to:

  • Add Tags.
  • Attach a file.
  • Create a Rule for how similar transactions should be recorded.
  • Exclude the transaction if you have, for example, a duplicate one or a personal expense.

Before you take either of the latter two actions, talk to us. We don’t want you to do anything that might adversely affect your bookkeeping.

When you’ve finished, click Confirm. The transaction will move from the For review list to the Categorized one. It will now appear in the register for that account.

Once you’ve confirmed a transaction, it moves into the Categorized list.

As you might imagine, it’s a good idea to keep up with your downloaded transactions so you have time to give each the attention it needs. We recommend you review them daily. Your transactions, of course, flow into your reports and taxes, so you want to be sure you’re categorizing them correctly. Let us know if you’d like help with this.

How to Use Tags in QuickBooks Online

Where is your money coming from? Where is it going? You can use tags in QuickBooks Online to find out.

QuickBooks Online offers numerous ways to help you track your sales, expenses, and profitability. If you’re using QuickBooks Online Plus or Advanced, you can create and assign Classes to transactions to differentiate between, for example, store departments or product lines. Some of the site’s reports are designed specifically for these tools, like Sales by Class and Profit and Loss by Class

You can assign Categories to products and services to gain insight into your sales and inventory. There’s a different set of Categories that you’ll use when you record bills and expenses. These are important for reporting and tax purposes. You can also add a Location field to sales transactions so you can track sales by stores, sales regions, or counties, for example.

What Are Tags?

Then there are Tags, which are fairly new to QuickBooks Online. These are customizable labels that you can assign to transactions (invoices, expenses, and bills). They’re more flexible than the tools we’ve already mentioned – they allow you to track your money any way you want. They don’t affect your books, and they’re not included in the customization criteria for reports. But there are two reports specifically designed for them: Profit and Loss by Tag Group and Transaction List by Tag Group.

Creating Your Own Tags

Once you’ve given your group a name, you can start adding tags to it.

Before you create a tag, you need to create a Group. Groups consist of related tags that share a common theme. For example, say you do some event planning. You might have a group titled Events. Individual events might read, for example, Grayson Wedding, Spring Art Show, and Hillman Conference.

To get started, click the gear icon in the upper right. Under Lists, click Tags to get to the tool’s home page. (You can also click on the Transactions link in the toolbar, then click the Tags tab.) Click New, then Tag group. A vertical panel slides out from the right. Enter a name in the Group name field. Click the down arrow to select a color, then click Save

Enter your tags one by one in the fields labeled Tag name. Click Add after each one until your list is complete. Click the Edit button to make any changes. When you’re finished, click Done. The main Tags page will open again, and you’ll see your new group under Tags and Tag Groups. Repeat to add as many as you’d like, up to 300 tags.

Using Tags

You can add tags to any transaction that contains a field for them

.

Let’s look at how you’d use tags in an expense. Click the Expenses link in the toolbar, then New transaction | Expense in the upper right. Click the down arrow in the Payee field in the upper left and select + Add new. Enter Billy’s Bridal in the Name field Leave the Type as Vendor and click Save. Back on the Expense screen, select the Payment account, Payment date, and Payment method for the expense (reference number is optional).

Directly below those fields, you’ll see the Tags field. Click Manage tags if you need to add or edit one; the right vertical pane you saw before will slide out. Otherwise, click in the field below Tags. Your list of tags will drop down. Select Grayson Wedding to move it into the field. You can assign as many tags as you’d like to transactions, but you can only select one tag from each group. Finish the expense and save it. 

Go back to the Tags home page, and you’ll see that there’s a link to one transaction in the Events row. At the end of each row is the Action column, where you can run a report, add a tag, and enter or delete a group. Your expense total appears in the Money Out (by tag) box above it. 

Tags are a great addition to the tools QuickBooks Online provides to help you track incoming and outgoing funds. If you’re not familiar with the others we mentioned at the beginning of this column and want to learn how to explore them, let us know. We’d be happy to walk you through their use and help you understand how they can make your finances more understandable.

Should You Charge Late Fees? QuickBooks Can Help

Do you have a lot of aging receivables? Assessing finance charges can speed up customer payments.

Have your customers been submitting payments later than usual these last several months? It wouldn’t be surprising. Many businesses are struggling to pay bills these days. Still, you need to get paid – and on time. Tardy receivables have a negative impact on your own cash flow.

We’ve discussed ways to encourage prompt payment in past columns. For example, you can start accepting credit/debit cards and direct bank transfers, make sure invoices go out immediately after a sale, or offer a premium like a small one-time discount for paying on time 12 months in a row to name a few.

You can also assess finance charges on remittances that come in after the due date. QuickBooks provides the tools to allow this.

Setting It Up

Before you start charging extra for late payments, you’ll need to do some setup work in QuickBooks. Open the Edit menu and select Preferences, then Finance Charge. Click the Company Preferences tab. You’ll see a window like this:

Graphical user interface, text, application

Description automatically generated

You can set your own preferences for assessing finance charges in QuickBooks.

You’ll have to answer these questions and enter your responses in the window:

What will your Annual Interest Rate (%) be?

What will you set as a Minimum Finance Charge?

Will you allow a Grace Period? This is the number of days given to your customers to make their payments after the due date before finance charges kick in. This is typically from 15-21 days.

Where should captured finance charges go? In this example, the Finance Charge Account has been assigned to Other Income

Do you want to Assess finance charges on overdue finance charges? Some jurisdictions don’t allow you to charge interest on overdue interest charges. If you want to do this, check on your local lending laws – specifically state usury laws which may limit the amounts that can be charged.

When will you start to Calculate charges? In this example, the due date is selected. So, QuickBooks will start to add finance charges 21 days after the stated due date. If you choose invoice/billed date, you’ll want to make your grace period longer. This can be rather a confusing concept. Contact us if you want a deeper explanation.

Assessing Finance Charges

There’s one more issue on the Preferences screen that you’ll need to resolve. QuickBooks offers two ways to notify customers about finance charges. You can’t include them on invoices, like you may be used to seeing on credit card bills. Rather, you have to print separate invoices that only contain the finance charges. 

If you put a check in the box in front of Mark finance charge invoices “To be printed,” you can print them out separately. If you leave the box blank, the finance charges will appear on the customer’s next statement. Click OK when you’re done with this window.

Graphical user interface, table

Description automatically generated

QuickBooks can find the overdue invoices that need to have finance charges applied and display them in a window like this one.

Open the Customers menu and select Assess Finance Charges. A window like the one in the image above will open. Make sure that the Assessment Date is the actual date you want to assess charges, which may not be the current date. Click in the Assess column to create a checkmark for every customer you want to charge. When you’re done, click Assess Charges.

When you’re ready to print finance charge invoices, open the File menu and select Print Forms | Invoices to open a window like this:

Graphical user interface, table

Description automatically generated

Invoices with an FC preceding the number are finance charge invoices ready for printing.

Lots to Learn

Besides knowing whether you can charge finance charges on existing finance charges, there are other considerations. For example, do your state’s lending laws allow you to use the phrase “finance charge” or must you use something like “late fee?” When should you assess finance charges? Have you notified your customers of your intent to begin assessing finance charges? This is definitely something they should know in advance. You might need to add this to your customer message on invoices.

We can’t tell you whether finances charges are the path you should take to improve your cash flow as there are many issues to consider. But we can help you with the mechanics of doing so and are here to answer any questions. Let us know if you want to get started using this tool, we can help.

New to QuickBooks® ? Try These 5 Activities

QuickBooks can be overwhelming when you first start using it. Here are five ways to familiarize yourself with some of its features to get you up and running in no time.

Tackling any new piece of software can be daunting. Add a complex process like accounting to the mix, like QuickBooks does, and you may feel apprehensive about your ability to learn how to use it. 

But QuickBooks was designed for small businesspeople, not for accountants nor technical wizards. It uses familiar language and forms, and it works like other Windows programs. That doesn’t mean, though, that you’ll be able to just jump in and start completing your accounting tasks. 

Here are five steps you can take to start familiarizing yourself with QuickBooks that will get you up and running in no time. We’ll assume that you’ve already created your company file. If you need help with this critical first step, let us know.

Open a sample file.

While you’re exploring QuickBooks, it’s a good idea to work with a sample file. That way, you can look around and practice without risking compromising your company file. You’ll be able to see how completed records and transactions should look and try your hand at entering sample data of your own.

QuickBooks comes with sample files that allow you to practice entering data without harming your own company file.

Before you open a sample file, you’ll need to close your current company. Click on File in the upper left to open that menu, then select Close Company. A window will open that should have your company file in its list. Below that, you’ll see three boxes containing different options. Click on the down arrow next to Open a sample file, as pictured above (this may look slightly different in your version). Choose the one you want to open and click on it. QuickBooks will load again with that file open. When you’re done looking at the sample file, go to File | Close Company again. The No Company Open window should appear again. Click on your company file name and then on Open to return to your own file.

Learn where your lists are.

You’ll be storing a great deal of information in lists. QuickBooks maintains these automatically sometimes when you enter information in a record or transaction. For example, when you create a record for a product or service you sell, it goes into a master list that you can access by opening the Lists menu at the top of the screen and clicking on Item List. You’ll also open the Lists menu when you want to add options to an existing type of list, like Class List (QuickBooks allows you to assign Classes to transactions so you can group related information, like New Construction or Remodel if you’re a contractor).

You’ll sometimes select from lists of commands in QuickBooks. This is the menu for the Item List.

Try a Transaction.

There are two transactions you’ll probably be using the most: invoices and sales receipts. QuickBooks comes with templates that resemble these sales forms’ paper counterparts. You simply fill in the blanks by entering data and selecting options from drop-down lists. Open the Customers menu and select Create Invoices. Click the back arrow above Find in the upper left corner to see sample invoices. Then click the right arrow to get back to a blank form and create an invoice by clicking the down arrows in blank fields to see your sample lists.

Explore Snapshots.

Once you start entering records and transactions, you’ll want to be able to access that information in ways that provide insight on how your company is doing. You’ll eventually start running reports in QuickBooks, but the software also accomplishes this through its Snapshots. There are three of them, and they all provide these overviews by using data tables and charts. Open the Company menu and click on Company Snapshot, then click the tabs to move between Company, Payments, and Customer. You’ll learn how QuickBooks provides real-time information about your finances.

Look at the Income Tracker.

It’s easy to see the status of your invoices (and estimates) in QuickBooks. Open the Customers menu and select Income Tracker. Colored bars at the top of the screen show you what’s outstanding and what’s been paid. A list of the related transactions appears below these bars.

This partial view of the Income Tracker tells you how much money is tied up in unbilled Time & Expenses and unpaid Invoices.

As we said earlier, QuickBooks can be overwhelming when you first start to use it. We can ease that transition by providing training and helping you move your existing accounting information over to the software. If you’ve started using QuickBooks on your own and you have questions, we can always step in to offer answers.

Stay healthy, and best wishes for a more prosperous 2021.

QuickBooks Online’s Mobile App: The Basics

QuickBooks Online is more portable than you may realize.

In this work-from-home world, millions of people are finding it impossible to get away from the “office”. But there may be times when you’re not at home or work when it would be really convenient to have access to your accounting data in QuickBooks Online. 

The site’s free companion apps make that possible. Available for both Android and iOS, the QuickBooks Online mobile app can do many of the things that you’re used to doing on your desktop or laptop. And of course, everything you do on the app is synchronized with your browser-based version, and vice versa. Both versions look and work similarly and offer a user experience that makes your mobile tasks easy to accomplish. 

Here’s a look at what you can do.

The QuickBooks Online mobile app doesn’t look much like the browser-based version, but it can do many of the same tasks.

Navigation Tools

Once you’ve downloaded the QuickBooks Online mobile app and entered your login credentials from the browser-based version, you’ll see a screen full of shortcuts to the app’s main functions. This is an abbreviated list of what you can actually do, but it takes you to the screens you’ll want to see most often. Click the All tab, and a full set of links for the app opens that includes functions missing from the shortcuts page, like Reports and Products & services. 

Click on the home button in the lower left, and the app opens two more screens. One is a Dashboard that’s similar to the one you see in your browser. It displays charts for profit and loss, invoices, and expenses, as well as a list of your account balances. Click the Activity tab to see a list of the most recent activity. Like most everything on the app, the list is interactive. When you click on an activity, the transaction underlying it opens.

There are two more navigation links at the bottom of the screen. When you want to add a transaction, you can click on the + (plus) sign to open your options there. Click the three horizontal lines to open the Shortcuts page. The gear icon in the upper left takes you to the Settings screen, where you’ll find links to Company Information, Tax Rates, Overdue Invoice Alerts, etc.

Records and Transactions

Customer and vendor records are not as detailed as they are on the browser-based site, but they should serve you well for mobile activities. You can toggle between basic contact details and recent activity. There are also icons that allow you to quickly call, text, or email a contact. Product records are not as complete, however you can see each item’s name, description, sale price, tax status, and account and category assignments. You have the ability to edit records and create new ones on the apps.

You can view the data from your browser-based version of QuickBooks Online on the mobile app.

You can also add and edit transactions on the mobile apps, including invoices, estimates, sales receipts, expenses, and invoice payments. These are very thorough. They include the fields you need to bill customers and record purchases. You can even request signatures on estimates, add notes or attachments to invoices, and view a status bar for invoice progress.

Other Features

There are other tasks you can complete on the QuickBooks Online mobile apps. You can snap photos of receipts with your phone. The apps will then upload them to the main site and move some of their data on to the correct fields on forms. You can work with bank deposits, projects, and categories. And you can record mileage for business trips. If you turn on Auto-tracking, the apps will record your mileage as you drive.

There’s one more feature on the app that’s fairly new to QuickBooks Online – so new that it may not have been rolled out to you yet: Cash Flow. This is divided into two sections on the main site, Overview and Planner. The second deals with cash flow projections, which can be a complex concept to understand. We recommend you let us walk you through this tool so you know when it may be wise to take actions that will prevent an impending cash crunch.

Are you experiencing cash flow problems now because of the economic downturn? We can analyze your data and reports in QuickBooks Online and help you come up with a recovery plan, contact us to help you.

How Do You Create Price Levels in QuickBooks?

QuickBooks allows you to create Price Levels that you can assign to customers and jobs and to individual items.

You already know that when you create a product or service record in QuickBooks, you must assign a sale price to it. But did you know that QuickBooks gives you a great deal of flexibility when to comes to pricing items you sell? The software allows you to create one or more additional Price Levels that you can access in invoices, estimates, sales receipts, credit memos, and sales orders.

There are three ways you can use these. Once you’ve created them, they’ll be available in a drop-down list in the Rate field. This means you can assign them manually to individual transactions. The second option is to assign them globally to specific customers or jobs. Once you’ve done so, that price will apply every time you create a transaction for one of them. Finally, you can create price levels for selected items.

Here’s how it works. Let’s say you want to be able to create a price level that’s 15 percent below the actual price that you can use in individual transactions. You open the Lists menu and select Price Level List. Click the arrow in the lower left corner next to Price Level and select New. A window like this will open:

You can create price levels in QuickBooks and assign them to individual sales transactions.

Fill in the field next to Price Level Name, and then click the arrow next to Price Level Type. Select Fixed %. Select decrease from the drop-down list on the next line and enter your percentage number. Round up to the nearest is an optional field, Click OK when you’re done. The next time you create a sales transaction, your new price level will be available as an option when you open the drop-down list in the Rate column.

When you need to edit or delete a price level, go to Lists | Price Level List again and click the arrow next to Price Level in the lower left corner. You have several options here. You can, for example, make a price level inactive so it doesn’t appear on the list. The field next to Price Level is labeled Reports. Click on the arrow to see what’s available there.

Customers and Jobs

You can also apply a price level you’ve created to a specific customer or job, perhaps to reward a customer for frequent purchases. When you do so, that rate will appear every time you enter a sales transaction for the customer or job you selected.

Open the Customers menu and select Customer Center. Double click on a customer or job’s name to open the record. Click on the Payment Settings tab. Click the arrow in the field next to Price Level and select the right one, then click OK.

You can assign a Price Level to specific customers or jobs.

Per Item Price Levels

QuickBooks also allows you to set custom prices for specific items that are associated with preferred customers or jobs (this option is only available if you’re using QuickBooks Premier or Enterprise). Let’s say you want to give a 10 percent discount to specific customers who purchase your website development services. Go to Lists | Price Level List and click the arrow next to Price Level in the lower left corner again, then select New (you can also get to the New command by right-clicking anywhere in the window). 

Give your price level a name (like Web Development 10 Off), then select Per Item from the Price Level Type drop-down list. Click in front of the Item you want to include. The fields in the next line should read as pictured in the image below: 10% | lower | standard price. Click Adjust. You’ll see your reduced prices in the Custom Price column in the table above.

You can establish a Price Level for specific items in QuickBooks.

Again, the rounding field is optional. When you’re finished here, click OK. The next time you create a sales transaction for a customer who is eligible for the lower price, you’ll select Web Development 10 Off from the drop-down list in the Rate column.

Feel like you’re outgrowing your current version of QuickBooks, or is it several years old? Talk to us about upgrading. We’re here to support you and to help you more effectively use the software as your business changes and grows.

10 Tips for Better Budgeting…

…and how QuickBooks Online can help you with the mechanics.

If you already have a budget, it’s probably been difficult for you to stick with it for the last several months. Unless you provide products and/or services that have been in great demand since the  COVID-19 pandemic took hold, you’ve had to adjust your budget significantly.

Better days are ahead, though, and now is a good time to start doing some planning for 2021. While there are still likely to be uncertainties next year, creating a budget will give you a starting point. A budget increases your awareness of all of your projected income and expenses, which may make it less likely that you’ll find yourself constantly running short on funds.

Here are some ways you can make your budgeting process more effective and realistic.

Use what you already know. Unless you’re starting a brand-new business, you already have the best resource possible: a record of your past income and expenses. Use this as the basis for your projections.

Be aware of your sales cycle. Even if you’re not a seasonal business, you’ve probably learned that some months or quarters are better than others. Budget conservatively for the slower months.

Distinguish between essential and non-essential expenses. Enter your budget items for the bills and other expenses that must be covered before you add optional categories. 

You can use data from a previous year to create a new budget in QuickBooks Online.

Keep it simple. Don’t budget down to the last paper clip. You risk budget burnout, and your reports will be unwieldy. 

Build in some backup funding. Just as you’re supposed to have an emergency fund in your personal life, try to create one for your business.

Make your employees part of the process. You shouldn’t be secretive about the expense element of your budget. Try to get input from staff in areas where they have knowledge.

Overestimate your expenses, a little. This can help prevent “borrowing” from one budget category to make up for a shortfall in another.

Consider using excess funds to pay down debt. Debt costs you money. The sooner you pay it off, the sooner you can use those payments for some non-essential items.

Look for areas where you can change vendors.  As you’re creating your budget think carefully about each supplier of products and services. Can you find less costly alternatives?

Revisit your budget frequently. You should evaluate your progress at least once a month. In fact, you could even start by budgeting for only a couple of months at a time. You’ll learn a lot about your spending and sales patterns that you can use for future periods.

How QuickBooks Online Can Help

QuickBooks Online offers built-in tools to help you create a budget. Click the gear icon in the upper right corner and select Budgeting under Tools. Click Add budget. At the top of the screen, give your budget a Name and select the Fiscal Year it should cover from the drop-down list by that field. Choose an Interval (monthly, quarterly, or yearly) and indicate whether you want to Pre-fill data from an existing year. 

QuickBooks Online supplies a budget template that already contains commonly used small business items.

The final field is labeled Subdivide by, which is optional. You can set up budgets that only include selected Customers or Classes, for example. Select the desired divider in that field, then choose who or what you want included in the next. Click Next or Create Budget in the lower right corner (depending on whether you used pre-filled data) to open your budget template. If you subdivided the budget, you’ll see a field marked View budget for. Click the down arrow and select from the options listed there.

To create your budget, you simply enter numbers in the small boxes supplied. Columns are divided by months or quarters, depending on what you specified, and rows are labeled with budget items (Advertising, Gross Receipts, Legal & Professional Fees, etc.). You simply enter numbers in the boxes that apply. When you click in a box, a small arrow appears pointing right. Click on this, and your number will automatically appear in the rest of that row’s boxes. When you’re done, click Save in the lower right. You can edit your budget at any time.

QuickBooks Online provides two related reports. Budget Overview displays all of the data in your budget(s). Budget vs. Actuals shows you how you’re adhering to your budget. 
We know creating a budget can be challenging, but it’s so important – especially right now.  We’d be happy to look at your company’s financial situation and see how QuickBooks’ budgeting tools—and its other accounting features—can help you get a better understanding of your finances.

How to Create Product Records in QuickBooks® Online

Whether your company sells product or services, QuickBooks Online can help you track them.

If you sell one-of-a-kind products and can see all of them at a glance, tracking your inventory isn’t such a big issue. But not many people run businesses like that. Even if you do, you’d want to keep track of what you have and what you’ve sold for accounting purposes.

Most businesses sell multiple types of products and stock numerous units of them. These companies need to be able to easily add them to invoices and sales receipts. They need to know what’s selling and what’s not, and they need to know when it’s time to reorder.

QuickBooks Online’s recording and tracking tools meet all of these requirements by allowing you to create records for services. Here’s how it works.

Getting Ready

Before you can start working with QuickBooks Online’s product records, you should make sure that the site is set up for this purpose. Click the gear icon in the upper right, then Your Company | Account and settings. Click the Sales tab to get to the Products and services section, as pictured below.

QuickBooks Online’s Account and Settings has a section devoted to Products and services.

Click on Products and services to open your options here. To turn any entry from On to Off, or vice versa, click in the box at the beginning of the line to check or uncheck it. To see an explanation of each, click on the small circled question mark. When you’re done here, click Save. Then click the X in the upper right to close this window.

Creating Records

To start entering product and service data in records, click the gear icon in the upper right, then select Products and services. Since you haven’t entered anything yet, the table will be blank. Eventually, it will contain data for each record you’ve created. You’ll also notice two colored circles at the top of the screen, one marked Low Stock and the other, Out of Stock. When there is a number next to either of them, you’ll be able to click on either circle to see a list of what’s low or what’s out.

Click New in the upper right. A vertical panel will slide out asking what kind of record you want to create. You can choose from:

  • Inventory – Physical items you sell whose quantity you want to track
  • Non-inventory – Products you buy or sell but whose quantities you don’t need to track
  • Service – Services you sell, like legal representation or landscaping
  • Bundle A group of products and/or services that are sold together, like computer training and accompanying software

We’re going to create an inventory item, so click on Inventory. Type its Name in that field and add a photo if you’d like. If the product has been assigned a SKU, enter that in its field. You may want to divide your products into primary categories and sub-products or services (like Writing Instruments and Pens, Pencils, Markers, etc.). You can skip this option if you don’t.

QuickBooks Online helps prevent product shortages.

In the next section, you’ll enter the Initial quantity on hand. How many do you have as of (current) date? And where do you want to set your Reorder point? What number of items remaining should trigger the Low Stock alert so you can replenish your supply?

Inventory asset account should already be set at Inventory Asset. Enter a brief Description and then the product’s Sales price/rate (the price you’ll charge customers) and leave Income account set at Sales of Product Income. Then select a Sales tax category. If you haven’t set up sales taxes in QuickBooks Online and believe you’re required to pay them on at least some sales, please let us help. 

In the Purchasing information field, enter the description that should appear on purchase forms, then Cost (the price you paid to buy the product, if any). The Expense account should be Cost of Goods Sold. Select a Preferred Vendor if you’d like and Save the record.

Not all fields are required in your product and service records, but we strongly recommend you complete each record as thoroughly as is possible.

Next month, we’ll look at how product and service records are used in QuickBooks Online. In the meantime, please let us know if there’s any way we can help with your accounting or your use of QuickBooks Online. We know these are challenging times for you, and we hope you’ll use us as one of your resources.