Transforming Your Business with Remote Bookkeeping

In today’s dynamic business landscape, remote bookkeeping has emerged as a pivotal tool for companies seeking efficiency and growth. The transition from traditional, in-office bookkeeping to a remote setup offers a plethora of benefits that can transform the way businesses manage their finances.

1. Cost Efficiency

One of the most immediate benefits of remote bookkeeping is the reduction in operational costs. Businesses no longer need to allocate resources for additional office space, equipment, or on-premise software for their bookkeeping staff. This shift can lead to substantial savings, particularly for small and medium-sized enterprises (SMEs) that operate with tighter budgets.

2. Access to Expertise

Remote bookkeeping opens doors to a broader talent pool. Businesses are no longer restricted to hiring local talent and can access highly skilled bookkeepers from across the globe. This not only ensures that you have someone with the right expertise but also promotes diversity in skills and approaches to financial management.

3. Enhanced Flexibility and Scalability

As businesses grow, their financial needs become more complex. Remote bookkeeping services are inherently scalable, allowing businesses to easily adjust the level of service based on their current needs. This flexibility is crucial for startups and growing businesses that experience fluctuating demands.

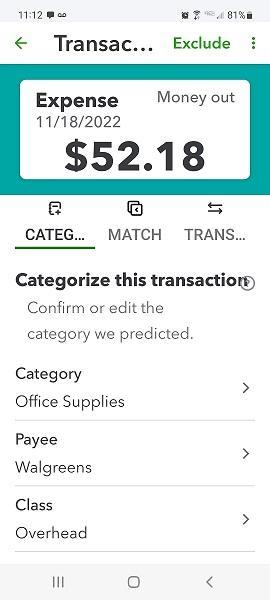
4. Improved Efficiency and Productivity

With the automation of many bookkeeping tasks and cloud-based accounting software like QuickBooks, data entry becomes more efficient, reducing the likelihood of errors. This automation allows business owners and their teams to focus on core business activities rather than getting bogged down with financial paperwork.

5. Real-time Financial Insight

Remote bookkeeping enables real-time updating and access to financial data. Business owners can make informed decisions quickly, a critical aspect in today’s fast-paced business environment. The ability to access financial reports and analyses anytime and anywhere offers a significant advantage.

6. Enhanced Security

Modern remote bookkeeping services place a high emphasis on data security, employing advanced encryption and security protocols to protect sensitive financial information. This level of security is often more robust than what small businesses can implement on their own.

In conclusion, the shift to remote bookkeeping can be a transformative step for businesses. It not only streamlines financial management but also contributes to better strategic decision-making, efficiency, and overall growth. Embracing this modern approach to bookkeeping can be the key to unlocking your business’s full potential.

Transform your business today with our remote bookkeeping services.

Integrating QuickBooks with Other Business Tools: Boosting Productivity and Efficiency

In today’s fast-paced business world, maximizing productivity and efficiency is essential for staying competitive and successful. One of the most effective ways to achieve this is by integrating QuickBooks, a leading accounting software, with other business tools. By seamlessly connecting different applications and streamlining workflows, businesses can streamline operations, reduce manual tasks, and enhance overall productivity.

  1. Streamlining Data Management

Integrating QuickBooks with other business tools, such as CRM (Customer Relationship Management) systems, project management software, and inventory management solutions, can significantly streamline data management processes. The automatic synchronization of data across different platforms eliminates the need for manual data entry, reducing the chances of errors and saving valuable time.

For instance, when a new customer is added to the CRM, the integration can automatically create a corresponding entry in QuickBooks, making it easier to manage customer records, invoices, and payments without duplicating efforts.

  1. Accelerating Invoicing and Payment Processing

Integrating QuickBooks with payment gateways and billing systems can expedite the invoicing and payment processes. Customers can make payments directly through online portals, and the integration will automatically update payment statuses in QuickBooks, leaving no room for discrepancies. This not only ensures faster payments but also improves cash flow management for businesses.

  1. Enhancing Payroll and HR Management

Integrating QuickBooks with HR management tools or dedicated payroll software streamlines payroll processing and reduces manual payroll-related tasks. The integration can handle employee data, attendance records, tax calculations, and direct deposit information, ensuring timely and accurate salary disbursements. Additionally, this integration minimizes the risk of compliance issues, as all payroll data is kept up-to-date.

  1. Optimizing Inventory and Order Management

For businesses dealing with inventory, integrating QuickBooks with inventory management software is crucial. This integration enables real-time tracking of stock levels, automatic generation of purchase orders, and seamless synchronization of sales data. As a result, businesses can avoid stockouts, overstocking, and maintain efficient supply chains.

  1. Automating Expense Tracking

Integrating QuickBooks with expense tracking tools or mobile apps allows employees to easily capture and submit expenses on the go. By automating the expense management process, businesses can expedite reimbursement procedures, maintain better expense records, and gain insights into spending patterns.

  1. Centralizing Reporting and Analytics

Integrating QuickBooks with business intelligence tools consolidates financial data, allowing for more comprehensive and accurate reporting and analytics. Business owners and managers can access critical financial insights and performance metrics from a single dashboard, enabling data-driven decision-making.

Conclusion

Integrating QuickBooks with other business tools can significantly enhance productivity and efficiency within an organization. By automating processes, reducing manual tasks, and streamlining data management, businesses can focus on core operations and strategic growth. Embracing these integrations not only boosts efficiency but also helps maintain a competitive edge in the market, ultimately leading to sustainable success in the long run.

How to Set Up QuickBooks® for Your E-commerce Business

Setting up QuickBooks for your e-commerce business is a great way to manage your finances, track sales, and stay on top of your financial health. Below is a step-by-step guide to help you set up QuickBooks for your e-commerce business:

  1. Choose the Right QuickBooks Version:
    QuickBooks offers different versions, including QuickBooks Online and QuickBooks Desktop. For most e-commerce businesses, QuickBooks Online is recommended because it provides easy access from anywhere with an internet connection and has a variety of integrations with e-commerce platforms.
  2. Sign Up for QuickBooks Online:
    Go to the QuickBooks website and sign up for an account. You’ll need to provide some basic information about your business during the registration process.
  3. Set Up Your Company Profile:
    After signing up, you’ll be prompted to set up your company profile. Fill in your business details, including the business name, address, industry, and tax information.
  4. Link Your Bank Accounts and Payment Processors:
    Connect your business bank accounts and any payment processors you use for your e-commerce transactions. This will enable QuickBooks to automatically import your financial data, saving you time on manual data entry.
  5. Configure Sales Tax Settings:
    If your e-commerce business is required to collect sales tax, set up your sales tax settings in QuickBooks Online. This will ensure that sales tax is accurately tracked and applied to transactions.
  6. Import Your Chart of Accounts:
    A chart of accounts is a list of all the categories where you record financial transactions. QuickBooks provides a default chart of accounts, but you can customize it to match your e-commerce business needs.
  7. Integrate E-commerce Platform:
    If your e-commerce platform supports integration with QuickBooks, set up the integration to automate the flow of data between the two systems. This integration will help streamline the process of importing sales, inventory, and customer information.
  8. Record Sales and Expenses:
    As you start making sales and incurring expenses, record them in QuickBooks. Categorize transactions correctly using the chart of accounts you set up earlier.
  9. Manage Inventory (if applicable):
    If your e-commerce business involves selling physical products, QuickBooks can help you manage your inventory. You can track the quantity and value of your products, making it easier to understand your stock levels and profitability.
  10. Reconcile Your Accounts:
    Regularly reconcile your bank accounts, credit cards, and payment processor accounts with your QuickBooks records. This process ensures that all transactions are accurately recorded and that your financial statements are up to date.
  11. Run Financial Reports:
    QuickBooks offers various financial reports, such as profit and loss (income statement), balance sheet, and cash flow statement. Use these reports to gain insights into your e-commerce business’s financial performance and make informed decisions.
  12. Set Up Budgets (optional):
    If you want to plan and monitor your e-commerce business’s financial goals, consider setting up budgets in QuickBooks. Budgets help you track your actual performance against your projected targets.

Remember that while setting up QuickBooks for your e-commerce business can be relatively straightforward, it’s essential to maintain good bookkeeping practices consistently. Regularly update your financial records, reconcile accounts, and review financial reports to keep your business financially healthy and compliant. If you’re uncertain about any aspect of the setup process, consider consulting with a QuickBooks expert for guidance.

We are happy to help!

The Benefits of Hiring a QuickBooks© ProAdvisor for Your Small Business

Small business owners often have a lot on their plate, from managing employees to overseeing daily operations, and everything in between. With so many responsibilities, it can be difficult to keep track of financial records and ensure that all finances are in order. This is where a QuickBooks ProAdvisor can help.

A QuickBooks ProAdvisor is a certified professional who is trained in using QuickBooks accounting software. Hiring a ProAdvisor can bring numerous benefits to your small business, including:

  1. Expertise and Knowledge: A QuickBooks ProAdvisor is an expert in using QuickBooks software and can offer advice and support on everything from setting up the software to creating reports and managing your finances. They have the knowledge and experience to help you make informed decisions about your business.
  2. Time-Saving: As a small business owner, you likely have a lot of tasks to manage on a daily basis. By hiring a QuickBooks ProAdvisor, you can save time and focus on other areas of your business that require your attention. A ProAdvisor can take care of your bookkeeping, payroll, and tax-related tasks, leaving you with more time to grow your business.
  3. Accurate Financial Reporting: QuickBooks ProAdvisors can help ensure that your financial records are accurate and up-to-date. This can help you make better business decisions based on accurate financial data.
  4. Cost-Effective: Hiring a full-time bookkeeper or accountant can be expensive for a small business. By hiring a QuickBooks ProAdvisor, you can get the expertise you need at a fraction of the cost.
  5. Training and Support: QuickBooks ProAdvisors can provide training and support to you and your employees, ensuring that everyone is familiar with the software and can use it effectively.
  6. Peace of Mind: With a QuickBooks ProAdvisor handling your finances, you can have peace of mind knowing that your financial records are accurate and up-to-date.

In conclusion, hiring a QuickBooks ProAdvisor can be a valuable investment for small business owners. By providing expertise, saving time, ensuring accurate financial reporting, being cost-effective, offering training and support, and providing peace of mind, a ProAdvisor can help you take your business to the next level.

Save Time, Keystrokes with Recurring Transactions in QuickBooks© Online

Your time as a business owner is valuable. Don’t waste any of it doing duplicate data entry.

Accounting takes time. And the last thing you need when you’re working with your company’s finances is activity that takes unnecessary minutes. If you’ve created a record or transaction once, you don’t want to have to enter the information a second or third time.

That’s why using QuickBooks Online is so far superior to manual accounting. It remembers everything, so you can use data again when you need it. But sometimes you have to give it a little guidance.

That’s the case with recurring  transactions. If you have forms that you create repeatedly, with very few changes (like utility bills), you can “memorize” the transactions. When the bill comes around the next month, you can modify any details necessary and dispatch it again. Here’s how it works.

Three Options

To get started, enter a transaction that you want to save and be able to use again (with changes). Let’s say it’s an invoice that you send to a customer once a month who has a service contract for network maintenance. When you’ve completed the form, look toward the bottom of the screen and click Make recurring. The screen will now read Recurring Invoice, with new content as pictured below.

Graphical user interface, application

Description automatically generated

You can specify transactions as recurring and add details like frequency and start/end dates.

If you want to change the Template name to something that will remind you of its purpose, you can do so. In the field beneath Interval, select Daily, Weekly, Monthly, or Yearly, and then indicate what day of the month the transaction should occur. Enter a Start date and End [date] or select None if the length of service is open-ended. In example above, you would receive a reminder from QuickBooks Online three days before the invoice is scheduled to go out. The service contract has no ending date, so you’d continue to get reminders until you change the template.

Next to the Template name is a field labeled Type. QuickBooks Online gives you three options for taking action on the recurring transaction. It can be:

  • Scheduled. This is an automated option that should be used with caution. If you select this, your transaction will go out as scheduled with no intervention from you. Only the date will change.
  • Reminder. QuickBooks Online will send you a reminder ahead of the scheduled date. You can specify how many days ahead you should receive it. Then it’s up to you to make any necessary changes and send it out.
  • Unscheduled. QuickBooks Online will do nothing except save your template.

When you’ve completed all of the required fields, click Save template in the lower left. 

Using Recurring Transactions

If you’ve chosen the Scheduled option for any transactions, you don’t have to do anything more with it until you want to change its content or status. To find your list of recurring transactions so you can process any that are you earmarked as Reminder or Unscheduled, click the gear icon in the upper right of the QuickBooks Online screen. Under Lists, click Recurring transactions.

Graphical user interface

Description automatically generated

The Recurring Transactions table

The screen that opens displays a table containing all of your recurring transactions. You can learn just about everything you need to know about those transactions here: Template Name, Type, Txn (Transaction) Type, Interval, Previous Date, Next Date, Customer/Vendor, and Amount

The last column in the table, labeled Action, opens a menu that displays different options depending on the  type of transaction. For our Reminder example, you can: 

  • Edit (edit the template, not the transaction)
  • Use (opens the original transaction that you can edit, save, and send)
  • Duplicate (duplicate the template)
  • Pause (stop sending reminders temporarily)
  • Skip next date
  • Delete

Looking Ahead

We’re a month into 2023 now. What does this year look like for you? Is QuickBooks  Online doing everything you need it to do? If you’re starting to outgrow your version, we’d be happy to consult with you about upgrading to another service level (Essentials, Plus, or Advanced). Or if you know the version you’re using is supposed to do something you need but you can’t quite figure it out, let us know. We want 2023 to be a good year for you, and we’d like to make your accounting work as painless and productive as possible.

What Can QuickBooks Online’s Mobile App Do?

If you haven’t checked out QuickBooks Online’s free mobile app, you might be surprised at how much it can do.

There was a time when leaving the office meant you were done with work for the day. These days, many homes are offices. And easy mobile access has made it difficult to get away from work.

That can be a good thing, especially if you’re a small business owner who must keep a close eye on what goes on outside of regular hours. Many productivity websites have mobile companion apps that make it possible to pick up where you left off when you were sitting at your laptop or desktop.

QuickBooks Online is one of them. Its mobile apps (iOS and Android, which look and work similarly) can’t replicate absolutely everything on the website. For example, you can’t work with projects or pay contractors or define sales taxes or run most reports. But they do a good job of providing the tools you’d most likely need when you’re away from your regular workspace. Let’s take a look at them.

A Terrific User Experience

Intuit did a great job designing its mobile apps to be easy to use on small screens. It takes very little time to learn how to navigate around, and individual working screens are clean, attractive, and understandable. 

When Should You Use Apps?

There are only two things that QuickBooks Online’s apps can do that the desktop version can’t: track mileage and snap photos of receipts. There are other situations when it’s very convenient to have the apps available, like creating a sales receipt or invoice for a customer in person, adding basic details for a new customer or vendor, or checking your account balances. It’s probably best to do the bulk of your work on your desktop or laptop when you can, to avoid errors caused by small—and abbreviated—screens.

Navigation Icons

The apps open to a screen called Today, which is their version of a desktop application’s Dashboard. There are links to actions like creating an invoice and looking up a customer, as well as a to-do list, the QB Assistant (a support tool), your account balances, a link to recent transactions, and real-time information about the status of your invoices and bills.

The other three icons at the bottom of the screen serve as navigation tools. The one on the far right labeled Menu opens two screens that can be toggled back and forth. One is Shortcuts, pictured below, a series of links to common actions. The other, All, opens a more traditional, comprehensive menu of links to individual app functions, like a Profit and loss report, Sales receipts, and Products & services.

The QuickBooks Online app’s Shortcuts screen

Besides those functions, there are links to other financial activities on the All screen. The ones you’d be most likely to use remotely are:

  • Transactions. The ones you’ve imported from your banks are available via this shortcut, as well as any you’ve entered manually on your desktop or phone. You can also get to the list by clicking on an account name on the Today screen.
  • Receipt snap. Using your phone’s camera, you can take a picture of a receipt. The app will pull some of its data and deposit it on an expense form that’s accessible on the app and the desktop version, where you can fill in the blanks and see the picture. 
  • Invoices and Estimates. View, modify, and add them.
  • Customers and Vendors. Abbreviated versions of your records.
  • Expenses and Bill Pay.
  • Mileage. Enter trip data manually or automatically, through your phone’s location services.

Data entry on the mobile apps is as easy as it is on the browser-based version of QuickBooks Online.

About Your Business

Another bottom-of-screen icon takes you to My business, which provides an update (charts and numbers) of your income, expenses, and profitability. And another is Cash flow. Cash flow is actually a pretty complex accounting concept that you can’t fully absorb on a mobile phone screen, but it’s very important that you have a good understanding of how your company is doing. You can ask us about this.

Give It A Try

January is always a good time to develop new habits. We’ll be talking about some of these next month, but in the meantime, you might download and explore QuickBooks Online’s mobile app. You probably won’t need our help learning to use it, but we’re always happy to step in and assist when you’re having trouble with desktop QuickBooks Online.

5 QuickBooks Online Tasks You Should Do Before January 1

It’s probably your busiest month of the year. But there are things you can do to make your return from the holidays less stressful.

December always goes by so quickly. Seems like you’ve just finished Thanksgiving dinner and it’s time to ring in the New Year. You could probably spend the entire month on your personal obligations. But it’s also the end of the year, which means your busiest period if you’re a retailer. Even if you’re not, you probably have sales goals to try to meet. And you may have employee issues that need to be addressed before the calendar turns over.

On top of all of this, you should be closing out your books for the current year (as much as you can) in preparation for the new one. If you’ve been using QuickBooks Online conscientiously all year, your job will be a lot easier. But you’ll still need to carve out some time for year-end tasks.

We don’t expect that you’ll necessarily be able to wrap absolutely everything up by New Year’s Eve. You may be waiting for your customers and employees to do their part. But here are five things you can do amidst all of your other personal and professional plans that will help you get a jump on January.

Analyze your 2022 sales.

You won’t have your final numbers until the year is over, but you can get a good start in December. There are several QuickBooks Online reports that can give you a clear, understandable look at your 2022 sales. Click Reports in the toolbar and scroll down to Sales and customers. You can run reports that will tell you what your sales were by Class, Customer, Customer Type, and Product/Service, in summary or detail. The reports are customizable, so you can specify date ranges and group the results by, for example, Transaction Type, Customer, and Account.

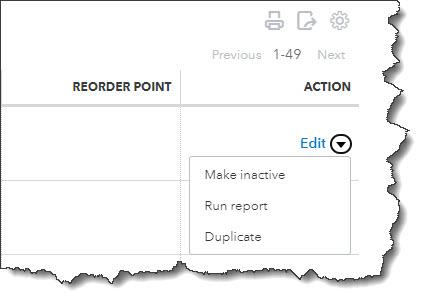
You can customize and run QuickBooks Online’s Sales reports.

Warning: If you’re not clear about whether you should run reports in Cash or Accrual mode, let us help you with this. The distinction is important.

Know What You Owe

If money is tight at the end of the year, this will be a challenge. But you don’t want to come back from the holidays to a lot of past-due notices. To see what still needs to be paid, click Reports again and scroll down to What you owe. If you want the straight scoop right away, run Unpaid Bills. For a more detailed look, create the Accounts payable aging detail report. This groups your outstanding payables by days past due.

Know Who Still Owes You Money

This is a question that’s probably on your mind all year, but it’s especially important as the year winds down. It may be difficult to get delinquent customers to pay up in December, but you should at least know where you stand with them. Click the Reports tab again and scroll down Who owes you. Generate two reports there: Accounts receivable aging detail and Open Invoices

You might also want to spend an hour coming up with some strategies that would encourage customers to pay faster. If you’re at a loss about this, we could sit down together and come up with a plan.

Create statements for past-due customers

Customer statements are something like reports. They display sales transactions within a given period. Statements can serve two purposes. Sometimes, customers just want a list of their invoices and payments for their records. You can also use statements as a reminder to customers who are past due on their accounts.  Click New in the upper left corner, and then click Statement under Other.  There are three types, but you’d be most likely to create and send two of them:

  • Open Item. Displays all open, unpaid invoices for the last 365 days. 
  • Transaction Statement. Lists all transactions for the selected date range.

You can send statements to customers to remind them of overdue payments or just to provide a record of transactions for a given period.

Clean up your customers and vendor lists

If you only have a few of each, your list is probably current. But if you’ve been adding customers or vendors for years without ever editing the list, you’re probably spending too much time scrolling. You don’t have to delete them. You can just make them inactive. Click Sales in the toolbar, then Customers. If you know a customer has no open activity and you want to hide them, click in the box in front of the company or customer’s name. Repeat this for as many as you want, then click Batch actions in the upper left, then Make inactive.

A Busy Month

Don’t worry if you don’t get to all of these by the end of the year. But do add them to your January task list if you don’t. You might also consider having us run the standard financial reports that are available in QuickBooks Online Reports, under For my accountant. You can create reports like Trial Balance yourself, but they can be hard to analyze accurately. We’d be happy to set up a time after the first of the year to go over these after all of your 2022 transactions are in.

Use QuickBooks Online Effectively: 7 Best Practices

Here are seven ways you can be safe, compliant, and productive when you’re using QuickBooks Online.

“Best practices” is a phrase that human resources professionals have been using for decades. But every type of profession has its own best practices, whether they call it that or not. These guidelines are not enforceable rules, though some managers may build them into their official policies. They just describe the way work should be done to achieve optimal outcomes and keep data organized and secure.

You may have heard of Generally Accepted Accounting Principals (GAAP). Public companies are required to adhere to them, and many other businesses large and small follow these rules and procedures.  

We’re not going to discuss GAAP in this month’s column. Rather, we’re going to talk about more general best practices for accounting, actions you can build into your QuickBooks Online work to make that time more productive and in line with what other successful businesses do.

How Do They Help?

Accounting best practices have numerous benefits. For example, they:

  • Help maintain the integrity of your QuickBooks Online data files.
  • Improve the  accuracy of your accounting work.
  • Save time.
  • Provide insight on the financial health of your business.

When you incorporate best practices into your work, you may even find that your relationships with customers and vendors get better because you’re handling their businesses ? conscientiously.

7 Suggestions For You

Here are seven guidelines that we try to follow. We hope you will, too.

Track your 1099 vendors

Graphical user interface, text, application

Description automatically generated

If your business employs contractors, make sure that you indicate their 1099 status in their vendor records.

Changes in the economy over the last few years have led some people to take on part-time (or even full-time) contract work. You should be creating vendor records for these individuals. Click Expenses in the tool bar and then select the Vendors tab. As you’re completing a record, you’ll see a section labeled Additional info. Check the box in front of Track payments for 1099. You can create and deliver your 1099s using QuickBooks Online when the time comes.

Reconcile, reconcile, reconcile

Once you’ve downloaded cleared transactions from your financial accounts, it’s important that you reconcile them. This is probably one of your least favorite tasks to undertake, but QuickBooks Online simplifies it for you some, walking you through the process. Reconciling accounts regularly can help you:

  • Discover errors and missing transactions.
  • Get a more accurate picture of your cash flow.
  • Make your reports more precise

Keep your lists up to date

Your QuickBooks Online company file can grow substantially over the years. Though the site has great search capabilities, you may still be scrolling to find the entries you want. This isn’t as big a problem for lists like Payment Methods or Terms, but overly lengthy lists of Products and Services, Customers, and Vendors can become unwieldy over time. Try to keep them current. If you don’t want to delete them completely, you can make individual records inactive by clicking an Action link in the listing table for each.

Graphical user interface

Description automatically generated

If your QuickBooks Online Lists are getting too lengthy, you may be able to make some of the records Inactive.

Categorize and classify everything that you can

Your QuickBooks Online company file consists of hundreds or thousands of individual records and transactions. Though each is a separate entity, there will be many times when you want to be able to assemble groups of related ones. For example, you might want a list of all of your customers in a specific ZIP code or all services that go into the creation of a marketing program.

There’s more than one way to get this information quickly. You can customize reports. Assign Classes, Categories, and Tags. View a Project. Whatever method(s) you choose, do use them consistently. They can provide insight in a wide variety of ways that will help you make better business decisions.

Warning: Before you start making lists of these classification tools and assigning them, think carefully about what they should be. You can always add to and edit the lists, but you’ll want to make them as focused and flexible as you can. Let us know if you need help with this.

Assign user permissions carefully

QuickBooks Online makes it possible to restrict users to specific areas and functions on the site. Use these tools. You can find them by clicking the gear icon in the upper right and then Manage users. You trust your employees or you wouldn’t have hired them, but you need to put controls in place to protect your sensitive company data.

Use QuickBooks Online’s reports

Are you taking advantage of QuickBooks Online’s report templates? It’s absolutely essential that you keep up with reports in areas like Who owes you and What you owe. We can help with this. We can also generate and analyze the standard financial reports that you occasionally need, like Statement of Cash Flows and Profit and Loss.

Don’t leave QuickBooks Online running and walk away

This should go without saying if you’re in a multi-person office. Also, don’t use the QuickBooks Online mobile app on a public Wi-Fi network when you’re out and about. Your company file contains information about your customers, vendors, and employees that should never be compromised.

More Than Common Sense

These best practices may seem like common sense to you if you’ve been using QuickBooks Online for a while. But when you first start using web-based financial applications, they might not be second nature to you. That’s why we’re sharing them with you, to remind you that conscientious use of QuickBooks Online is critical to the safety, accuracy, and usefulness of your company data. As always, we’re here to answer any question you have.

How to Give Your QuickBooks Online Forms a New Look

Your sales forms are a part of your company’s identity. Make them professional, personalized, and polished.

Your first impression of a business probably comes from a website or a mailing or an advertisement. The second might be from an invoice or sales receipt. What does it say about that company if its printed or digital sales forms are poorly designed or hard to read or just plain unattractive?

Customers form opinions about you not only from the quality of your products or services, but also by the professionalism and aesthetics of your written communications. Putting some effort into making them look good isn’t superficial. It’s an important part of your branding.

QuickBooks Online provides the tools you need to make your sales forms appealing, understandable, and consistent. They enhance your image and have impact on your customers’ overall impression of your business. Here’s how you can make them a part of your identity.

Where Do You Start?

QuickBooks Online comes with a default invoice form to get you started. You can either edit this one or create a new one. You can also make your own estimates and sales receipts. 

Click the gear icon in the upper right corner and select Custom form styles under Your Company. You’ll see the default invoice labeled Standard. We’ll leave that one as is and create a new one so there’s always a clean version. Click the down arrow next to New style in the upper right and select Invoice. You’ll see a copy of the default invoice, like this:

Table

Description automatically generated

This is QuickBooks Online’s default invoice template. You can make a copy of it and modify it for your own company.

You’ll see your modification options in the left pane of this screen. Your choices are divided into three different sections. Before you start working with them, enter a name for your new template in the field at the top. QuickBooks Online will have suggested a name, but you can change it to something descriptive that you’ll remember, like My Modified Invoice 1022

Changing the Form’s Look

The first tab, Design, should be highlighted. From here, you can:

  • Change up the template. Choose from one of the six options that QuickBooks Online offers.
  • Add a logo. Browse your system files to find your logo.
  • Splash on some color. Select a color palette from the ones offered.
  • Get choosy with your font. Select a new font type and size.
  • Edit print settings. Change the margins and other print options.

Editing the Content

When you’re done there, click the Content tab. You’ll notice that your invoice, which appears in the right pane, is grayed out. There are three pencil icons on the right side of the form. Click the one in the upper right corner, next to the invoice number. The top third of the form becomes active, and the content in the left pane changes to match the fields on the right. As you make changes in the left pane, like checking a box to add a phone number, the actual sample invoice changes to reflect that.

Graphical user interface, text, application

Description automatically generated

When you add, edit, or delete content in the left vertical pane…

Text

Description automatically generated

…the changes are reflected in the sample invoice in the right pane. Your company information will appear like this across all of your sales forms.

As you click on the other two pencil icons in the sample invoice, the left pane displays your options for those content areas. You have control over all of the content on your forms. It’s even possible to add your own custom fields. Let us know if you want to do so and we’ll show you how.

Readying Customer Emails 

The third tab on the customization screen, labeled Emails, shows you what your form will look like when you email it to your customer. Again, your working area is in the left pane, with the finished result appearing on the right. You have multiple options here, including text for the subject line, greeting, and message. You can also edit the text for reminder emails. 

When you’re done customizing, you can preview the PDF that will be attached to your customer emails. Then click Done. Your new invoice will appear on the Custom form styles page. Whenever you want to modify an existing sales form, click Edit at the end of its row. You can also make any form the default by opening the Edit menu and clicking Make default

Making your sales forms the best that they can be doesn’t really take that long. And it will demonstrate to your customers that you care not only about the quality of your products and/or services, but also about your communications with them. If we can be of any help as you work with forms modification in QuickBooks Online, please let us know. We’ll be happy to walk you through the process.

How QuickBooks© Online Tracks Products and Services, Part 1

What products and services does your company sell? Do you have enough to fulfill existing and future orders? QuickBooks Online can tell you.

Most small businesses maintain a changing inventory of multiple products. Even if you sell one-of-a-kind goods, you need to know what you’ve sold and what’s available. And if your company sells services, you also have to keep track of what you’re able to offer customers.

QuickBooks Online can meet these needs. It allows you to create detailed records for both products and services. If you carry inventory, it can make sure that you always know what’s available to sell. When you enter sales and purchase transactions, the site draws on the records you’ve created to help you complete invoices, sales receipts, purchase orders, etc., without having to leave the form you’re working on.

Creating your records initially can take some time. And your products and services require regular monitoring and maintenance. But if you’re conscientious about these tasks, you’re not likely to run short on inventory or have too much money tied up in products that aren’t selling fast enough.

Preparing QuickBooks Online

Before you begin creating records and tracking inventory, you need to make sure that QuickBooks Online is set up correctly. Click the gear icon in the upper right. Under Your Company, click Account and settings. Click the Sales tab in the toolbar. You’ll see the Products and services section near the middle of the screen.

Graphical user interface, text, application, chat or text message

Description automatically generated

Make sure you’ve turned on the Products and services features you’re going to need.

Toggle the slider buttons on and off by clicking on them, and be sure to save your changes when you’re done. One option allows you to turn on price rules. This is still classified as a beta feature, but it’s live on the site. It’s also quite complicated to set up and can create confusion for your customers and revenue loss for you if it’s not done correctly. Let us help if you want to use this tool.

Creating Your Product and Service Records

Your first task, of course, is to build your product and service records. Hover your mouse over Sales in the left vertical toolbar on the home page and select Products and Services. The screen that opens is your home base for dealing with inventory and services. Eventually, it will contain a detailed table containing information about both. Two large buttons at the top of the page warn you when you have Low Stock or you’re Out of Stock.

Click New in the upper right corner. A vertical panel slides out from the right displaying your four options for Product/Service information. They are:

  • Inventory. If you buy and/or sell products whose quantities you must track, these items are considered inventory.
  • Non-inventory. You may have products that you buy and/or sell, but you don’t need to track the amount you have in stock. These are considered non-inventory.
  • Service. These are, well, services that you provide to customers, like landscaping or web design. You might sell these by the hour or project, for example.
  • Bundle. You might call these assemblies. Bundles are multiple products and/or services that you sell as a package for one price.

Click on Inventory for this example. Here is a partial view of the pane you’ll see:

Graphical user interface, text, application, email

Description automatically generated

You can track your inventory levels and reorder points when you create inventory product records in QuickBooks Online.

To create a product or service record, just fill in the blanks on the form and save it. Some fields are optional. In fact, only three are required: Name, Initial quantity on hand, and As of date. Of course, your inventory tracking and the use of product and service records in transactions and reports will be much more effective if you complete as many of the fields as possible. We recommend that you at least provide answers in some additional fields (some of which aren’t shown here), including:

  • Category (will be useful in reports, for example)
  • Reorder point (will keep you from running out of items)
  • Inventory asset account (you can leave the default, Inventory Asset)
  • Description (for sales forms)
  • Sales price/rate (what the customer will be charged)
  • Description (for purchase forms)
  • Cost (what you pay to buy it)
  • Expense account (often Cost of Good Sold, but you can ask us to be sure)

Next month, we’ll discuss how QuickBooks Online makes these records available as you complete other tasks, like transactions. In the meantime, please let us know if you have other questions we can answer that would help you use QuickBooks more effectively. We hope you’re enjoying your summer!