Make QuickBooks work faster for you by changing a few settings.
Whether your business has been locked down because of the pandemic, or you’re scrambling to hold things together with fewer employees or diminishing sales, you’re probably leaning on QuickBooks more than ever. You may be watching dwindling inventory items closely or monitoring your daily cash flow or trying to collect on invoices that aren’t being paid because your customers are short on money.
QuickBooks can help with all these accounting tasks. But you certainly don’t want to waste time now just dealing with the software’s mechanics.
As always, we’re available to help as you deal with the toll that COVID-19 is taking on your company. We’d also like to suggest that you spend a little time customizing QuickBooks. Streamlining its operations will take some of the unnecessary frustration out of your work life.
Getting Around Quickly
QuickBooks tries to accommodate different work styles and preferences by providing multiple navigation methods. These are:
• The old, standard Windows menus.
• The home page’s icons.
• The Icon Bar that appears in the left vertical pane by default (you change its position by opening the View menu).
If you’re going to use the Icon Bar, we recommend that you set it up to make your most often-used tools prominent. Right-click in the toolbar and click on Customize Shortcuts to open the Customize Icon Bar window. In the upper left corner, you’ll see a list of your icons as they’re currently arranged. You can rearrange them by grabbing the small diamonds to their left with your mouse and dragging them to their new positions. You can change their labels by clicking Edit, or Delete them.
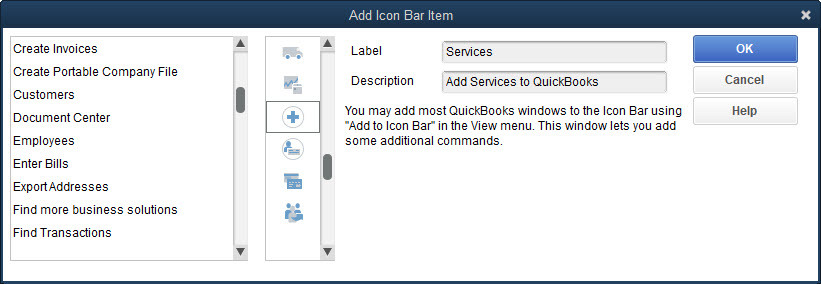
You’re not limited to the items in the list. Click Add, and the Add Icon Bar Item opens, as pictured above. Click on any of the ones you want to include in the Icon Bar, then click OK. QuickBooks allows you to add almost any screen to your Icon Bar. Navigate to the window you want to add, then open the View menu and select Add…to Icon Bar. If you never use the Icon Bar, you can collapse it by clicking the small arrow to the right of the Search box at the top of the pane. You can also close the home page by clicking the lower of the two small X’s in the upper right.
Tile Your Windows
If you regularly work with the same handful of screens, there’s a faster way to access them. Open them all, then open the Window menu and select Tile Vertically. All the windows will be displayed on the same screen, arranged vertically. If there are enough of them, they will overlap. To activate one, just click on it. You can open it to full screen by clicking the small rectangle in the upper right and return to your vertical arrangement by clicking the double rectangle in the upper right.
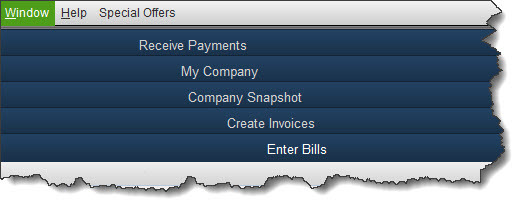
If you’d prefer, you can Tile Horizontally. Or, you can click Cascade to display them stacked on top of each other with only each window’s title label showing, as shown below. If you want to go back to a blank screen and start over, click Window | Close All. The Window menu also displays a list of open windows that can be used for navigation.
The Desktop View
There are other ways you can make QuickBooks work the way you want it to. Open the Edit menu and select Preferences, then Desktop View. Click on the My Preferences tab if it’s not already highlighted. There are several preferences here. Look under the Desktop heading. You can have QuickBooks open to the configuration of windows you want. Your options are:
• Save [the windows that are already open] when closing company.
• Save current desktop (a specific set of windows).
• Don’t save the desktop (always open to just the home page).
Click the Company Preferences tab to add or remove icons from the home page. This is also where you turn features on and off.
We’re Still Here
All these suggestions may seem minor to you. But they will save time. More important, they will give you a better sense of control over the hours you spend on accounting tasks. And with so many things out of our control right now, creating a software environment that is tailored to your workflow can benefit you.
We know that you may be struggling right now to maintain your financial health, as well as your physical health. More than ever, we hope you’ll contact us if you have a QuickBooks or general accounting problem that we could solve. We’ll be happy to do what we can to help you through during this very challenging period.