Your sales forms are a part of your company’s identity. Make them professional, personalized, and polished.
Your first impression of a business probably comes from a website or a mailing or an advertisement. The second might be from an invoice or sales receipt. What does it say about that company if its printed or digital sales forms are poorly designed or hard to read or just plain unattractive?
Customers form opinions about you not only from the quality of your products or services, but also by the professionalism and aesthetics of your written communications. Putting some effort into making them look good isn’t superficial. It’s an important part of your branding.
QuickBooks Online provides the tools you need to make your sales forms appealing, understandable, and consistent. They enhance your image and have impact on your customers’ overall impression of your business. Here’s how you can make them a part of your identity.
Where Do You Start?
QuickBooks Online comes with a default invoice form to get you started. You can either edit this one or create a new one. You can also make your own estimates and sales receipts.
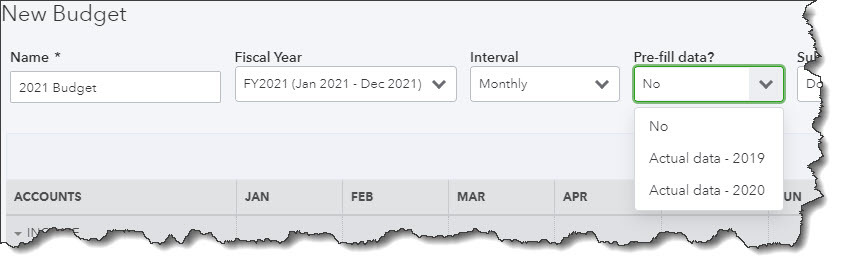
Click the gear icon in the upper right corner and select Custom form styles under Your Company. You’ll see the default invoice labeled Standard. We’ll leave that one as is and create a new one so there’s always a clean version. Click the down arrow next to New style in the upper right and select Invoice. You’ll see a copy of the default invoice, like this:
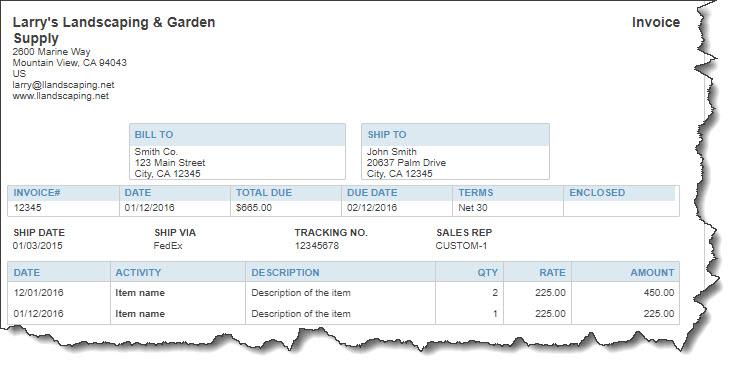
This is QuickBooks Online’s default invoice template. You can make a copy of it and modify it for your own company.
You’ll see your modification options in the left pane of this screen. Your choices are divided into three different sections. Before you start working with them, enter a name for your new template in the field at the top. QuickBooks Online will have suggested a name, but you can change it to something descriptive that you’ll remember, like My Modified Invoice 1022.
Changing the Form’s Look
The first tab, Design, should be highlighted. From here, you can:
- Change up the template. Choose from one of the six options that QuickBooks Online offers.
- Add a logo. Browse your system files to find your logo.
- Splash on some color. Select a color palette from the ones offered.
- Get choosy with your font. Select a new font type and size.
- Edit print settings. Change the margins and other print options.
Editing the Content
When you’re done there, click the Content tab. You’ll notice that your invoice, which appears in the right pane, is grayed out. There are three pencil icons on the right side of the form. Click the one in the upper right corner, next to the invoice number. The top third of the form becomes active, and the content in the left pane changes to match the fields on the right. As you make changes in the left pane, like checking a box to add a phone number, the actual sample invoice changes to reflect that.

When you add, edit, or delete content in the left vertical pane…

…the changes are reflected in the sample invoice in the right pane. Your company information will appear like this across all of your sales forms.
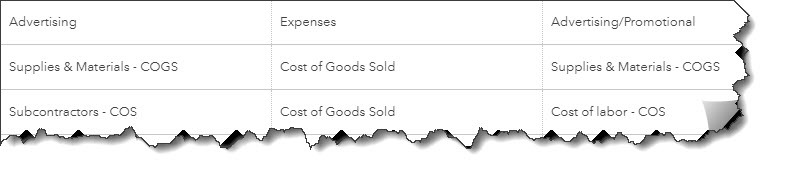
As you click on the other two pencil icons in the sample invoice, the left pane displays your options for those content areas. You have control over all of the content on your forms. It’s even possible to add your own custom fields. Let us know if you want to do so and we’ll show you how.
Readying Customer Emails
The third tab on the customization screen, labeled Emails, shows you what your form will look like when you email it to your customer. Again, your working area is in the left pane, with the finished result appearing on the right. You have multiple options here, including text for the subject line, greeting, and message. You can also edit the text for reminder emails.
When you’re done customizing, you can preview the PDF that will be attached to your customer emails. Then click Done. Your new invoice will appear on the Custom form styles page. Whenever you want to modify an existing sales form, click Edit at the end of its row. You can also make any form the default by opening the Edit menu and clicking Make default.
Making your sales forms the best that they can be doesn’t really take that long. And it will demonstrate to your customers that you care not only about the quality of your products and/or services, but also about your communications with them. If we can be of any help as you work with forms modification in QuickBooks Online, please let us know. We’ll be happy to walk you through the process.